


Introduction: Why Print & Embroidery Quality Matters
In 2026, apparel brands and buyers demand flawless logos, graphics, and designs on their clothing. But what happens when your carefully designed print cracks—or your embroidery puckers, unravels, or simply looks sloppy? Print & Embroidery Quality Guide (Failures & Fixes) breaks down the most common failures, explores their root causes, and gives you actionable steps to set and meet quality standards. Whether you’re producing for high-street labels or niche startup brands, mastering embroidery quality control and print finishing is make-or-break for your reputation.
Understanding Embroidery Quality Control: Basics & Benchmarks

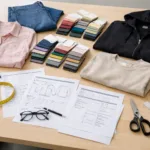
Embroidery quality control (QC) is a systematic process to ensure every stitched logo or art matches expectations for appearance, durability, and consistency. Buyers and manufacturers use set benchmarks for assessment—covering thread tension, colorfastness, placement, stability, and the absence of defects. Effective QC starts from sampling and carries through bulk production. Brands often use custom embroidery guides during product development for alignment on desired outcomes.
Common Embroidery Failures: What Goes Wrong?
Even with modern machinery and skilled operators, embroidery can suffer visible defects. These are the most frequent:
- Thread Breakage (“爆线”): Thread snaps or unravels, creating gaps or loose ends.
- Puckering (“起皱”): Fabric wrinkles around or under the embroidered area.
- Design Misalignment: Logos or patterns appear off-center, crooked, or outside specified zones.
- Color Bleeding & Fading: Colors run after washing or fade too quickly.
- Weak Bonding or Lifting (脱胶): Applied patches, prints, or backing begin to peel away.
- Fraying Edges: Exposed threads unravel from the logo edges.
Common Print Failures in Apparel Decoration
Printing methods (screen, digital, DTF, sublimation) each risk a unique set of problems. Key issues include:
- Cracking/Peeling: Design layers separate from the garment, often after washing.
- Color Inaccuracy: Printed hues differ from artwork due to ink or substrate mismatch.
- Ink Bleeding: Edges become blurred, especially on stretchy or textured fabrics.
- Poor Registration: Multi-color prints are misaligned, resulting in ghosting or gaps.
- Uneven Coverage: Light spots or incomplete fill in solid print areas.
Production Process Flow: Where Failures Start
Most failures trace back to one of these stages:
- Design & Sampling: Flawed or over-dense designs; using too-small text or fine detail.
- Materials Selection: Low-quality thread, ink, stabilizers, or base fabric.
- Machine Setup: Incorrect tension, speed, needle choice, or environmental conditions.
- Operator Error: Inconsistent handling or inattention to spec sheets.
- Poor Post-Processing: Not trimming, heat-sealing, or finishing as required.
Root Cause Analysis: Diagnosing Embroidery Failures
Finding the real reason for quality issues is vital. Here’s how to approach:
| Failure | Typical Cause | Quick Fix |
|---|---|---|
| Thread Breakage | Wrong tension, needle burrs, poor thread | Adjust tension; replace needle; switch thread type |
| Puckering | Poor backing, excess density, weak fabric | Upgrade stabilizer; adjust stitch density/design |
| Design Misalignment | Hoop slip, operator error | Re-hoop carefully; use positioning marks |
| Color Bleeding | Unstable dye; wrong thread | Use colorfast, tested threads and fabrics |
| Weak Bonding (脱胶) | Improper application/temperature | Refine bonding temp/time; test adhesives |
Diagnosing Print Failures: How to Pinpoint the Cause
Root-cause analysis for printing issues follows a similar logic. Examine:
- Artwork Quality: Vector preferred; watch out for scaling artifacts.
- Film/Stencil Issues: For screen printing, blurred or incomplete screens cause poor edges.
- Ink Compatibility: Use ink matched to garment fiber content (e.g., water-based vs. plastisol for cotton).
- Curing & Drying: Insufficient heat results in peeling or poor wash durability.
- Operator Training: Skill gaps cause registration and misprint errors.
Acceptance Standards: What Does “Good” Look Like?
Industry standards define clear pass/fail criteria. Common acceptance checkpoints include:
- Color Consistency: Matches Pantone or digital swatch within specified delta E (difference).
- Stitch Density: Consistent fill without crowding or gaps.
- Placement Tolerance: Usually within ±5mm of intended location.
- Durability Tests: Survives at least 5 machine washes at 40°C with no major change.
- Surface Appearance: No loose threads, wrinkles, or visible distortion.
Sometimes, clients may request seam strength tests and shrinkage/colorfastness verification for higher-value programs.
Setting Up Effective QC: Roles & Inspections
Robust QC involves checks at various points:
- Pre-Production (sample approval, color/proof signoff)
- Inline QC (random checks during run) – quickly spots defects
- Final Inspection (statistical sampling, often using AQL standards)
- Record-Keeping & Traceability (helps pinpoint where issues recur)
Read a comparison of inline QC vs final inspection to decide the most effective method for your workflow.
Embroidery Acceptance Criteria: Spec Sheet to Shipment
Embroidery QC begins with an approved spec: thread count, colors, stitch types, and location. Inspections should always compare actuals to spec sheets. Typical pass/fail criteria are:
- No more than 1 loose thread in a 10-piece batch
- No severe puckering under natural light
- No misplacement beyond 5mm from specified mark
- All colors and logo components clear and distinguishable
Apparel Print QA Standards: Test Methods
Every print technique requires unique QC. Example test methods:
- Stretch Test: Light stretch should not break or lift ink layer
- Wash Test: After 3–5 washes, look for cracks or peeling
- Rub/Fade Test: Rub a white cloth across design to check for loose pigment
Brand-specific standards may also apply. Many apparel companies refer to guides like the Embroidery vs Puff Print for Hoodies guide when setting these parameters.

Fixes for Embroidery Failures: Practical Solutions
- Re-balance Thread Tension: Regularly calibrate machines and use quality thread spools
- Switch/Upgrade Backing: Match stabilizer to fabric weight and stretchiness
- Optimize Digitizing: Work with experienced digitizers to create proper stitch paths
- Use Proper Hooping: Apply enough tension without distorting fabric weave
- Retrain Operators: Sample-based checklists and clear exception handling procedures
Fixes for Print Failures: Getting Consistent Results
- Control Curing Time & Temp: Regularly check and log heat press/dryer performance
- Improve Registration Systems: Use physical guides or auto-registration technology
- Audit Ink Inventory: Use fresh, batch-tested ink and avoid expired supplies
- Maintain Clean Equipment: Remove dust, old ink residue, or chemical build-up each shift
Embroidery Quality Control Tools & Inspection Aids
Essential QC tools for embroidery include:
- Thread tension gauges
- Magnifying loupes for close-up stitch inspection
- Color light boxes to check consistency
- Spec comparison templates (for placement verification)
Best Practices for Effective Print & Embroidery QC
- Keep QC checklists visual and simple
- Label all samples with production date & operator
- Store records digitally and on paper
- Validate repairs before resuming production
- Maintain open feedback between art/digitizing and shop floor teams
How Brands Like Ninghow Address Quality in Production
Experienced manufacturers like Ninghow often assign dedicated QC technicians for embroidery and print lines. From our observations, it’s crucial to run pilot tests with production thread, actual base fabric, and sample washes before launching a full round. This helps anticipate puckering and thread color mismatches long before bulk production starts. Reporting any deviations early—rather than just “fixing and forgetting”—is key to maintaining trust and consistency with international buyers.
Sampling, AQL, and Batch Inspection for Embroidery
The Apparel Quality Level (AQL) sampling system gives a statistically fair way to inspect large orders. Bulk inspections check for both major and minor defects, often accompanied by detailed photos. Operators should keep separate bins for QC fails, and supervisors must approve rework before garments rejoin the production line.
Training for Staff: Key to Quality Consistency
High staff turnover or reliance on new hires is a real risk in textiles. Practical, hands-on operator training is vital. Advanced producers supplement with detailed SOPs and regular refreshers—ensuring everyone understands both the “what” and the “why” behind every specification.
Technological Upgrades: Better Machines, Predictable Results
Modern embroidery and print machines now offer automated tension controls, multi-zone sensors, and faster pattern recall. Investing here can reduce human error and accidental variance even further. Many brands set fixed maintenance schedules to guarantee equipment stays within optimal spec—rather than waiting for breakdowns.
Minimizing Returns from Quality Issues
Returns erode both margin and brand reputation. Applying strict AQL inline QC—especially for logo/graphic-heavy apparel—has been shown to slash defects and customer complaints. Early detection is far cheaper than post-shipment fixes or replacements.
Cost of Rework: Why Prevention Beats Correction
Every re-embroidered panel or re-printed shirt adds time, labor, and wasted material. Hidden costs include disrupted workflow, rush shipping fees, and strained client relationships. Factories must balance preventive inspection with the need to keep running efficiently.
Print & Embroidery Quality Guide (Failures & Fixes)

To recap, high-quality embroidery and print require attention all the way from artwork to shipment. Spot failures early, investigate causes methodically, and apply specific fixes—don’t just rely on last-minute rework. Clear acceptance standards, skilled staff, and honest communication (from shop floor to client) enable consistency at scale.
Frequently Asked Questions
What is the best way to prevent thread breakage in embroidery?
Regularly check and adjust machine tension, use high-quality thread, and replace needles before they dull or develop burrs. Routine maintenance keeps breakage minimal.
How do I set acceptance standards for printed apparel?
Define placement, color tolerances, wash test criteria, and minimum durability. Share clear sample or digital mockups so all parties understand the “pass” threshold.
What are common causes of puckering under embroidery?
Poor backing, incorrect stitch density, and unstable fabrics typically cause puckering. Adjust digitizing and match stabilizer to fabric weight for better results.
When is inline quality control better than final inspection?
Inline QC catches defects as they happen, reducing waste and rework. Final inspection is useful for verifying shipment consistency but less effective at preventing problems early.
How often should QC tools be calibrated?
Visual and measurement tools (tension gauges, color boxes) should be checked at least monthly—or after any major maintenance or accidental drop.
What should a print or embroidery spec sheet include?
It should specify thread/ink types, stitch or layer density, placement locations, target Pantone colors, and acceptable tolerance ranges for all key parameters.
Related Reading
- How to Negotiate Minimum Orders Without Compromising on Quality
- The Real Cost of Quality Inconsistency—Lessons from the Factory Floor
- All About Apparel Embroidery Types & Their Best Uses
- Seam Strength: How to Identify Quality Clothing Construction
- Shrinkage & Colorfastness: Essential Testing Every Apparel Buyer Should Know
