


Adding a custom logo to a polo shirt is one of the most effective ways to promote your brand, unify your team, or elevate your apparel line. Embroidered logos offer a professional, durable, and high-quality finish that stands out from printed alternatives. Whether you’re a brand owner, event organizer, or apparel startup, learning how to embroider a logo on a polo shirt is key to creating polished, retail-ready garments.
At Ninghow, we specialize in custom embroidery for polos and other garments — offering low MOQs, fast sampling, and full brand customization. In this guide, we’ll walk you through the entire embroidery process, from logo prep to stitching placement.
Why Choose Embroidery for Polo Shirts?
Before we dive into the process, it’s important to understand why embroidery is the preferred method for polos:
- Professional Look: Embroidered logos appear sharp, dimensional, and upscale.
- Durability: Withstands frequent washing without fading or cracking.
- Texture and Depth: Adds tactile value and premium aesthetic.
- Versatility: Suitable for cotton, polyester, blends, and performance fabrics.
That’s why brands in hospitality, retail, sports, and corporate sectors often choose embroidery over printing.
Step 1: Prepare Your Logo for Embroidery
You can’t use a typical logo file for embroidery — it must be converted into a stitch-ready format.
1. Convert Logo to DST or EMB Format
- This is done through a process called digitizing.
- A digitizer maps out how your logo will be stitched: the thread path, density, angles, and layers.
Tips for Embroidery-Ready Logos:
- Use solid shapes with minimal gradients.
- Avoid tiny text or thin outlines — these may not embroider well.
- Keep your design within a 3”–4” width for chest logos.
Ninghow offers in-house digitizing to ensure optimal stitch results.
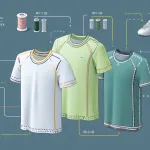
Step 2: Choose the Right Polo Shirt Material
Not all fabrics embroider equally. Here’s what to consider:
- Piqué Cotton: Classic, textured, sturdy — excellent for embroidery.
- Polyester Performance Fabric: Smooth, stretchy — may require stabilizers to prevent puckering.
- Cotton-Poly Blends: Good balance of comfort and stability.
We recommend testing embroidery on your fabric before full production.
Step 3: Decide Logo Placement and Size

The most common embroidery placements for polo shirts include:
- Left Chest (Standard): 3.5″–4″ wide
- Sleeve: Small logos or flags
- Back Yoke: Great for branding
- Collar: Subtle logo placement
Use a template or physical sample to ensure visual balance. At Ninghow, we mock up placements on actual shirts before stitching.
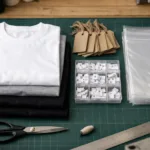
Step 4: Hoop and Stabilize the Polo
Proper hooping ensures accurate, clean stitching.
- Insert a stabilizer (usually cut-away or tear-away) behind the fabric to prevent shifting.
- Use an embroidery hoop to keep the fabric taut and flat.
- Ensure the logo area is centered and aligned.
On stretch fabrics, a water-soluble topping may be applied to prevent stitches from sinking.
Step 5: Embroider the Logo

Once the shirt is hooped and stabilized, it’s time to stitch:
- Load the digitized file (DST) into the embroidery machine.
- Select appropriate thread colors that match your brand palette.
- Run a test stitch on a sample fabric or extra garment.
- Begin machine embroidery, monitoring for thread breaks or puckering.
Commercial embroidery machines use 6–15 needles and can switch colors automatically.
Step 6: Finishing Touches

After embroidery is complete:
- Trim any excess threads.
- Remove stabilizers (tear-away or cut excess backing).
- Steam or press the embroidered area for a smooth finish.
Check the final product for alignment, thread density, and color accuracy.
Pro Tips for Better Embroidery Results
- Keep designs simple – small, clean logos embroider best.
- Use high-quality thread – polyester thread is colorfast and durable.
- Work with experienced digitizers – embroidery quality starts with the file.
- Match thread colors to your brand’s Pantone when possible.
At Ninghow, we offer detailed embroidery sampling to ensure you’re happy before full production begins.
FAQs: Embroidering Polo Shirts
Q: Can I embroider performance polos?
A: Yes, but extra care is needed. Use proper stabilizers and test stitch first to prevent distortion.
Q: What’s the MOQ for custom embroidered polos?
A: At Ninghow, our MOQ starts at just 100 pieces.
Q: Can I embroider multiple logo positions?
A: Absolutely. Many clients embroider chest + sleeve or chest + back yoke combos.
Partner with Ninghow for Custom Embroidered Polos
We’re more than a manufacturer — we’re your production partner. With a focus on flexibility and speed, Ninghow provides:
- Low Minimum Orders (from 50 pcs)
- Fast Sampling (7–10 days)
- Expert Digitizing and Embroidery Services
- Custom Polo Manufacturing (fabric, fit, trim, branding)
- Full Support for Startups and Scaling Brands
Whether you’re creating merch, uniforms, or launching your own line, we’ll help you get it embroidered right — from concept to completion.
