


Introduction: Why Quality Checks Matter in Team Apparel
When it comes to team apparel, nothing undermines unity and pride faster than subpar fabric, sloppy stitching, or a peeling logo. Coaches, buyers, and brand managers must understand how to check fabric, stitching, and logo quality in team apparel if they want garments that look sharp, last long, and represent the team with confidence. This comprehensive guide breaks down every practical test, insider tip, and industry checkpoint—perfect for anyone managing bulk orders, sampling before mass production, or sourcing a new supplier.
Understanding Team Apparel Quality: The Key Elements
![]()
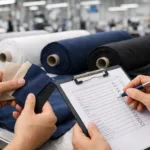
Team apparel quality is more than just fabric feel or a good-looking logo. Every garment should deliver comfort, durability, and consistent branding—on the field and off. Key elements include the fabric’s construction, colorfastness, and hand-feel; the accuracy of cut and stitching; and the method and durability of logo application. Knowing this quality checklist is the only way to avoid expensive production mistakes and disappointing deliveries.
Why Fabric, Stitching, and Logo Quality Define Value
Fabric, stitching, and logo execution aren’t just details—they determine overall garment value and reputation. Garments must withstand regular washing, potential stretching, and heavy use. Weak stitching or a poorly bonded logo can lead to returns or negative reviews. Practical buyers require hands-on tests and industry reasoning to avoid these pitfalls. For more on the vision behind building long-lasting uniforms, check out The Real Ingredients of Winning Team Uniforms: Comfort, Identity & Durability Decoded.
How to Check Fabric Quality in Team Apparel
Quality fabric forms the backbone of team apparel. Here’s how to judge it:
- Hand Feel: Is the fabric soft but strong? Does it recover its shape after stretching?
- Weight and Thickness: Lighter fabrics may suit athletic wear, but they shouldn’t be see-through or flimsy.
- Evenness: Hold the garment to light; notice any thin spots, inconsistencies, or snags?
- Colorfastness: Rub the fabric with a moist white cloth. Any dye transfer is a warning sign.
- Pilling and Surface Wear: Gently scratch or rub the fabric—does the surface fuzz or pill easily?
For team T-shirts, polos, or hoodies, suppliers will usually confirm the fabric’s GSM (grams per square meter) and blend. Always request swatches or a cut-panel sample before approval. This simple habit can save you from major supply chain headaches later. Want practical advice on smart sourcing? Don’t miss 7 Hard Truths: What Quality Control Buyers Need to Demand from a Team Clothing Manufacturer.
Evaluating Stitching: Seam Strength and Appearance
Strong fabric is worthless without reliable stitching. Here’s what to check:
- Stitch Density: Count stitches per inch on a seam (industry standard varies by apparel type—generally 10-12).
- Tension: Gently pull the seam; loose threads, gaps, or skipped stitches reveal poor QC.
- Consistency: Are stitches even, straight, and flat? Crooked or bunching stitches reduce garment life.
- Bartacks & Reinforcements: Stress points (shoulders, pockets) must be reinforced with extra stitching.
- Inside Finish: Turn the garment inside-out—look for overlocked (serged) edges and no dangling threads.
Checking Logo Quality: Embroidery, Print, or Heat Transfer?
Logos are where quality often slips. Key checkpoints differ by logo method:
- Embroidery: Edges should be crisp, stitches dense, and no backing visible from the front. There’s no excuse for loose threads or fraying.
- Screen Printing: Look for smooth, crack-free ink with vibrant color. Colors should remain solid even when the fabric is stretched.
- Heat Transfer: Edges must be fully bonded with no lifting, especially after gentle pulling. Modern transfers shouldn’t feel stiff.
Ask for a sample from the production line before approval. If errors repeat across multiple samples, the production setup or logo artwork likely needs improvement. Dive deeper into logo methods in Embroidery, Printing, or Heat Transfer: Which Logo Method Is Best for Team Clothing?.
Spotting Red Flags: Common Quality Failures in Mass Production
Watch out for these warning signs during your checks:
- Irregular dye lots (color difference across panels or shipments)
- Loose, skipped, or broken stitches
- Peeling or fading logos after one wash
- Obvious puckering around seams or logos
- Strange odors or excessive chemical smells
- Bulk garments that don’t match approved samples
The Role of Sampling and Pre-Production Approval
Manufacturers like Ninghow insist on strict sampling steps before hitting production lines. A proper pre-production sample lets buyers confirm all key details—fabric hand, garment fit, stitching layout, and branding method. This reduces disputes and sets a clear benchmark for bulk output. For brand managers, it’s an opportunity to adjust, retest, or refine before major money is spent. Learn why this step is vital in 5 Critical Ways Samples Protect Your Custom Team Clothing Orders.
How to Run a Custom Apparel Quality Check on Delivery
On-site checks and third-party inspections aren’t just for big brands. When your shipment arrives, sample random garments for hands-on testing:
- Visual scan: Confirm panel consistency, logo legibility, and color matching
- Pull-test: Test seam and logo attachment strength by hand
- Wash-test: Machine-wash one piece at 30°C to check shrinkage, logo durability, and seam resilience
Keep a copy of your approved sample for direct comparison. If major defects appear, you’ll know whether to request repairs, discounts, or remakes.
Fabric Types: How Different Materials Affect Quality Checks
Cotton, polyester, and technical blends all behave differently:
- Cotton: Feels soft, but lower-quality fibers pill and shrink easily. Comb bedsheets with your hand to test strength.
- Polyester: Smooth, durable, and colorfast, but poor versions can feel scratchy or retain odors.
- Stretch (Elastane/Spandex): Should return cleanly to shape with no bagging at knees or elbows.
- Technical and Recycled Fibers: Should pass all classic tests plus maintain print/embroidery stability.
Color Matching and Fastness Tests
Brand colors must be precise and consistent across every size and batch. Major checks include:
- Visual Color Consistency: Lay items side by side in daylight; batch-to-batch shifts are a dealbreaker.
- Light and Washing Fastness: Test for fading after sunlight exposure or repeated washing.
- Rubbing (Crocking) Test: Scrub a white cloth on the fabric—no color should transfer off.
For a deeper look at color selection and its branding power, see Team Apparel Colors that WOW: The Essential Guide for Stronger Branding.
Fit and Pattern Consistency Across Bulk Orders
You can spot low-quality factories by irregular sizing, shifting sleeve lengths, or poor fit. Key tips:
- Compare multiple sizes against the measurement chart and your approved sample
- Ensure patterns are cut on-grain (not twisting or skewed)
- Check placement of logos and trims on different sizes for uniformity
Trims and Accessories: Zippers, Buttons, and Drawcords
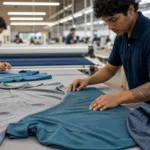
Zippers must zip smoothly, cords remain secure, and all accessories comply with safety standards (especially for youth teams). Reinforcing ends, testing snap strength, and feeling for rough edges can catch issues before bulk delivery.
![]()
Inside-Out Inspection: Labels, Threads, and Edging QA
Good QC means opening the garment out. Inspect labels (no spelling mistakes, correct information), check for hanging or loose threads, and confirm all seams are neatly finished. Clean inside work is a sign of a properly set-up factory.
Wash-Test: The Real-World Durability Check
Wash and dry a sample—the right way for that material. Check for shrinking, pilling, logo or print peeling, and changes in softness. If you handle custom teamwear for schools or sports, always insist on a wash-test sample for approval.
The Human Eye and Hand: Still the Best Final Judge
Even with all the tests and QC sheets, a skilled eye and hand have no substitute. Touch the fabric, stretch the garment, examine every logo, check seams up close. If something feels “off,” insist on clarification before proceeding.
What Decides Accept/Reject: Major vs Minor Defects
Not all flaws demand a full remake. Distinguish between major defects (affecting usability or brand reputation, like a misspelled logo) and minor, fixable issues (like a loose thread or missing carton label). Set clear acceptance criteria with your supplier before order confirmation.
Quality Assurance at the Manufacturing Source
Factories with professional QA check all garments during and after production, not just before shipping. At Ninghow, inspectors compare to the pre-approved sample every step of the way, which prevents repeat errors going unnoticed. If working with new suppliers, ask to see their in-line and final QC procedures.
Understanding Repeatability: Why Consistency is King
It’s easy to get one good sample—the challenge is achieving identical quality in every bulk order or repeat run. That’s where repeatable SOPs, reliable supply chains, and proper pattern/machine setup matter. Consistency is what creates trust in your supplier.
Packaging and Logistics: Protecting Finished Quality
The last step in QC is smart packaging. Each garment should be clean, folded, individually bagged (if required), and packed to avoid moisture and damage in transit. Clear carton labels prevent mix-ups on arrival. Damaged goods due to sloppy packing count as a manufacturing quality failure!
Documentation and Communication: A Buyer’s Best Tools
Keep records of quality checks, production confirmations, and approved samples. If issues arise, documentation protects both buyer and supplier, making it easier to negotiate a fair resolution—whether it’s a remake, refund, or discount.
The Bounce-Back Plan: Handling Quality Disputes and Remakes
If a shipment doesn’t meet standard, communicate immediately and clearly using your records and sample comparisons. Professional partners will investigate, propose solutions, and prevent repeat errors in future orders. Always check your contracts for quality clauses before payment and shipping terms are finalized.
Industry-Backed Resources Supporting Apparel QC
| Resource | How It Helps |
|---|---|
| Approved reference sample | Visual & tactile check against bulk goods |
| QC checklists | Standardizes procedures for all shipments |
| Third-party inspection services | Independent checks for large orders |
| Testing labs | Colorfastness, shrinkage, and performance testing |
How to Check Fabric, Stitching, and Logo Quality in Team Apparel
To confidently assess team apparel:
- Examine fabric for feel, strength, evenness, and color reliability
- Check all seams for tight, even stitching and reinforced stress points
- Inspect logos for method-appropriate clarity, adhesion, and finish (no loose threads, flaking ink, or lifting transfers)
- Run basic tests (pull, rub, wash) on random samples from bulk
- Compare with your approved reference sample, and document failures immediately
These steps, done carefully, let anyone—beginner or professional—spot true value from shortcuts in team apparel manufacturing.
Conclusion: Smart Quality Checks Mean Confident Teamwear Decisions

Judging custom apparel quality isn’t just for experts—it’s practical, hands-on, and achievable for every team or brand manager. When you know how to check fabric, stitching, and logo quality in team apparel, you protect your budget and reputation. Use your senses, document your standards, and partner with manufacturers who welcome transparency on QC. This is how teams show up proud, build brand trust, and get the uniforms they truly deserve.
Frequently Asked Questions
How can I test logo durability before ordering bulk team apparel?
Request a pre-production sample and perform a wash-and-pull test: wash the garment at least once, stretch the logo area gently, and see if it cracks, peels, or loses color. If it fails, ask for a different logo application method or improved bonding before approving bulk.
Why do some team apparel fabrics pill or fade quickly?
Low-quality fibers, poor dyeing processes, or a lack of technical finishing cause fabrics to pill or fade after wear and wash. Always ask for information on yarn type, check for even fiber structure, and run a small wash test on any new fabric swatch.
What’s the most common stitching issue found in poor-quality uniforms?
Loose, skipped, or extremely tight (puckered) stitches are the main suspects. These issues lead to weak seam strength and early garment failure, so always check that stitches are evenly spaced and reinforced at stress points.
How do I know if my team apparel logo was applied using embroidery, heat transfer, or printing?
Embroidery uses raised threads you can feel and see on the back of fabric. Screen printing has a smooth ink layer atop the fabric, while heat transfer logos often have a slightly rubbery feel and edges clearly bonded to the garment. Each has unique pros for durability and look.
Should I expect color differences between samples and bulk orders?
Slight shade variation is normal if different dye lots are used, but major color mismatches are a red flag. Always compare bulk shipments directly next to your approved sample and communicate strict requirements at the order stage to avoid surprises.
What is the first thing to check on arrival of a bulk apparel order?
Visually inspect several garments for color, stitching, fit, and logo consistency—directly compared to your approved sample. Any major discrepancy should be flagged and discussed with your supplier or factory before distribution.